Wednesday, March 31, 2010

Photo Frame Tutorial

.
Hi
Today I am posting a tutorial for a quick little photo frame.

I apologise for the quality of the photos, I really must learn how to take better photos.

This is the completed free standing photo frame.


To make this photo frame you will need the following supplies

(please keep in mind that I have done my best to work out the measurements as exactly as possible but I typically just work stuff out as I go along so you will need to check all measurements against your own work)


2 - 13cm x 13cm x .6cm chip board squares
1 sheet of clear acetate
Designer Paper
Cardstock
Thin ribbon
Embellishments
Double sided Tape
Paper Cutter
Craft Knife
Hole Punch
Modge Podge
Paint brush (for the modge podge)


Cut the following:

Designer Paper  - 14.2cm x 14.2cm
Cardstock - 10.6cm x 11.8cm
Clear Acetate - 13cm x 13cm

Cut the following pieces from one of the chipboard squares:

2 strips -13cm x 1.2cm
1strip - 10.6cm x 1.2cm
Rectangle - 10cm x 4.5cm


(please excuse the hair on the lense in this photo that I only just now noticed as I have uploaded the photo).

Punch holes through your chipboard square and large rectangle as shown in photo. Hole will need to be about 2cm from the bottom edge.

Make a cut across the top of the large rectange approximately 2.5cm from the top edge, but don't cut all the way through the chipboard. This rectangle will be the stand at the back of the frame. The small piece above the cut is where the double sided tape goes to adhere it to the back of the frame. The cut creates the hinge effect.

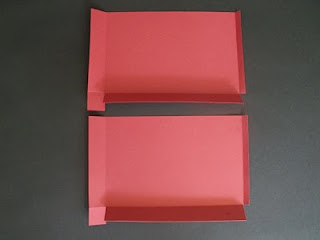
Place some double sided tape on the back of the thin strips and above the cut on the large rectangle.


Stick the strips of chipboard to the sides and bottom of the chipboard square.
Thread a piece of ribbon through the hole and tape in place.
The other end of this ribbon will go through the hole in the large rectange piece later on to work as a stopper so that the stand can not be bent too far back and break off.


Using double sided tape stick the cardstock down on to the chipboard to cover the ribbon.

Place strips of double sided tape around the edges and stick down the acetate square. (dont stick the acetate down at the top! This is where your photo will slide in and out)


On the back of the square of designer paper score .6cm (6mm) on all sides.

Then draw lines at 1.5cm all the way around.

Using your craft knife cut out the small square that you have drawn in the middle.


Run strips of double sided tape all the way around the back of the designer paper as shown in photo.

Cut two cuts on either side at the top and bottom of the square just to the .6cm score line, so that when you go to wrap the paper around the edges of the frame you get a much neater corner.

Cut a rectangular slit at the top of the designer paper as shown in the photo. This will be where your photo will slide in and out. This rectangular slit needs to line up with the square you have cut out in the middle but only needs to be about .3cm (3mm) wide.


Now stick the designer paper down on to the frame making sure to line the slit you have cut in the top of the designer paper with the opening at the top of the frame.


Now you can stick the stand to the back of the frame.

Thread the ribbon through the hole and tape it in to place.


Decorate the front of your frame with your chosen embellishments and then give it a coat of Modge Podge to seal it all.


I hope that this tutorial has made sense. It always seems to be that I do these very late at night! Please leave me a message if you have any questions.

Thanks for stopping by today.

Michelle

Sunday, March 28, 2010

My First Blog Award

.
Hi

What a lovely surprise I got when I received this lovely blog award from Sue at Sue's Spot today.


Now of course the trickiest part is choosing only 10 lovely Bloggy Friends to pass it on to.

So here in no particular order are some wonderful people I have chosen today to pass this award on to.

Lisa Jane - http://mess2magic.blogspot.com// - for being such a sweet Blog Friend.


Nicola - http://pretty-in-ink-blog.blogspot.com// - for having the cutest digi’s and always leaving the nicest comments.

Shirley-Anne (My Mum) http://shirley-anne-stampingforjoy.blogspot.com/ - For being my biggest supporter and my greatest inspiration.

Edna - http://edna15.blogspot.com/ - For being my first blog friend and helping me with some technical things when I first got my blog up and running.

Helen - http://helenmade.blogspot.com/ - for all your lovely comments on my blog

Marlene - http://disguisedasagrownup.blogspot.com/ - For giving me a great read (laugh) every day.

Bine - http://www.zimtschnecke.net/blog - For always leaving such lovely comments for me and sharing your beautiful work.

Selma - http://selmasstampingcorner.blogspot.com/ - for being such a sweet lady and for sharing your amazing talent.

Beverley - http://isastampingoodtime.blogspot.com/ - for always stopping by my blog and leaving lovely comments.

Emma - http://craftyemma.blogspot.com/ - for becoming my new blog friend.


Thanks for stopping by today.
Michelle

Saturday, March 27, 2010

Zoom!

.
Hi

Well, Im back on track making cards for boys again.

Like most, I guess I find it so much easier to make cards for women and girls. You can really go all out with the embellishments and ribbons etc. But with boys it's not so easy even harder for men.

I wasn't sure how this card was going to turn out. I coloured this image "Zoom"  from Mo's Digital Pencil Shop with my water colour crayons last night and wasn't sure how I planned to use it.


I stamped the background with stars then added the punched corners. At first I had a white brad in the corner of the punched corners but that didnt work so I used the blue star eyelets instead.

Then I added the orange and blue stars to the other corners but it still looked kind of flat so I added the faux stitching to the stars and punched corners.

I'm really happy with the finished product.

Thanks for stopping by today.
Michelle

Friday, March 26, 2010

All Boyed Out!

.
Hi

In an earlier post I said something about needing to concentrate on making more male cards but here I am posting yet another feminine card.

I think I am just way too boyed out at the moment after having the boys home sick for  few days. I obviously need to be infused in all things feminine for a bit longer.


This wonderful image "Video Girl" comes from Mo's Digital pencil shop.

I have coloured the image with Lyra Water Colour Crayons (still can't afford to start up a collection of Copics!)

Materials used are all from my scrap box (trying desperately to make a dent in the pile) so I can't be sure of the source.

Thanks for stopping by today.

Michelle

Thursday, March 25, 2010

Feeling Human Again

.
Hi

Oh it is so good to be feeling well again and to have the boys back at school/kindy. After all there is only so much Bob, Thomas or Iron Man a woman can take!

I'm sure there are a million jobs that have built up over the last few days that I should be turning my attention to but I have to admit I have been a little distracted by the new images that I bought from Pretty In Ink. They are so much fun to colour as I have said before, and I'm sure they have a certain theraputic quality and have aided in my recovery from this horrid virus.

On this card I have used Freya With Watering Can, Nicola's newest image. Isn't she just gorgeous!


This card was inspired by Nicola's card here.

I decided to hand draw the pot, bush, cloud and sun with a black marker and cut them out and stick them on to create the scene of Freya in the garden.

I drew the pot and bush directly on to patterned paper and used my water colour crayons to give them a little dimention.

I think it might have looked much nicer to have used stamped flowers and cut them out too instead of the little rhinestone ones. But by that stage I was over cutting things out.

The sentiment is computer generated.

Image coloured using Lyra Water Colour Crayons

Card stock and papers are all from my scrap stash so I can't be sure where they are from.

I have entered this card in to the Corrosive Challenge #56 which is paper piecing as well as Paper Sundaes Tenth Challenge which is also paper piecing.

Thanks for stopping by.

Michelle

Wednesday, March 24, 2010

Freddie With Chick

Hi

Well being home sick isn't all bad!

I'm getting a few cards made which is great.
I decided that I have so many cards for women and girls I really need to concentrate on making some for men and boys.

This time I decided to use one of Nicola's newer images over at Pretty In Ink. This one is called Freddie With Chick.


Recipe:
Douple sided Designer Paper from unknown source
Whisper White cardstock from Stampin Up
Pale Blue cardstock from unknown source
Certainly Celery Ribbon from Stampin Up
Freddie With Chick Digi Image from Pretty In Ink
Small Duck stamp from unkown source.
Lyra Water Colour Crayons.


Thanks for stopping by

Michelle

Tuesday, March 23, 2010

A Rose Is A Rose

Hi

My poor three little boys and I are off sick at the moment which is no fun but I have managed to make a card or two in the last couple of days.

This card I have made for two challenges.

Pretty In Ink Sketch Challenge#3
Secret Crafter Saturday Challenge #75 - Spring Has Sprung


Recipe:

Riding Hood Red, Whisper White & Old Olive Cardstock- Stampin Up
Bella Rose Designer Series Paper - Stampin Up
A Rose Is A Rose stamp set - Stampin Up
Ink - Riding Hood Red and Old Olive - Stampin Up

Thanks for stopping by.

Michelle

Sunday, March 21, 2010

Ribbon and Glitter

Hi

Today I am posting a card which I made for the following two challenges.


With some glitter on the crown, boa and shoes and the rhinestones in the corners I figured it fits with OSCC Let It Shine challenge and the ribbon across the middle is for the Totally Gorjuss #22 challenge.

This is the first time I have tried colouring an image with Stampin Up Stampin Write Markers.

Recipe:
Whisper White, Cameo Coral cardstock from Stampin Up.
Rasberry Tart Designer Series Paper from Stampin Up.
Stampin Write Markers Cameo Coral, Old Olive, More Mustard, Summer Sun and Creamy Caramel from Stampin Up.
White Ribbon - Unknown source
Clear Rhine stones.
glitter

Thanks for stopping by.
Michelle
Tuesday, March 16, 2010

Miss You

.
This is my card for this weeks sketch challenge over at Pretty In Ink.

(Click on image to enlarge)
Using Nicola's "Kelly with Hotwater Bottle" image from Pretty In Ink I tried to make it look like Kelly was lying on one side of a bed.

Recipe:

Rose Red, Cameo Coral, Pretty In Pink and Whisper White card stock from Stampin Up
Rasberry Tart Designer Series Paper from Stampin Up.
White Twill Ribbon unknown source.
Digital Image - Kelly with Hotwater Bottle - Pretty In Ink
Image coloured with Lyra Water Colour Crayons.

Thanks for stopping by.

Monday, March 15, 2010

In by the skin of my teeth!

Hi

It is just after midnight on Sunday night here in Australia and I have just finished the card I made for the sketch challenge over at Pretty In Ink.


And after a suggestion from one of my wondeful blogging friends "Lisa Jane" I am entering this card in to the following challenges as well.


Recipe:

Digital Image - Kelly With Balloon from Pretty In Ink
DSP from Stampin UP.
Chocolate Chip CS from Stampin Up.

Thanks for stopping by.

Sunday, March 14, 2010

Carriage and Journal combo

.
I know you have all seen a few of these on here now but I wanted to show you this last combination I have put together for my Son's teacher who is going on maternity leave shortly.


The carriages and mini journals created a lot of interest at our JeMbellish market stall this weekend just gone.

The carriage measures approximately 16cm tall and has two face washers rolled up inside.

The mini journal is made using the 13cm x 13cm (5.1" x 5.1") chipboard squares. it fits nicely inside the gift box behind.

Recipe for this set:

Rose Red, Cameo Coral and Very Vanilla CS from Stampin Up
Rasberry Tart DSP from Stampin Up
Very Vanilla Grosgrain Ribbon 1/4" and 5/8" from Stampin Up

Thanks for stopping by.

Tuesday, March 9, 2010

Complete Gift

.
Hi

This evening I have been working on packaging up my first attempt at journal making with my brand new Zutter Bind It All.

Those of you familiar with JeMbellish and our market stall and online store will know that what sets us apart is our range of "Complete Gifts". That being gifts that are beautifully packaged ready to give with a card.

I decided to package the mini journal up as a complete gift for our store.


Top of the box is an easle card and the sentiment in the scollop oval reads "on the birth of your beautiful baby"


Inside the box is the mini journal with a small pen tied to the side with a white ribbon.


With the lid back on the box and the easle card closed and tied with the ribbon.

Our market stall is this coming weekend and I hope to have a few of these ready for sale.

I have also entered this in to the YNS Challenge.

Recipe:

Regal Rose and Pink Pirouette cardstock - Stampin Up
DP from Hostess Level 1 Pattern Pack II - Stampin Up
Whisper White Ribbon 1/4" and 5/8" - Stampin Up
"Congrats" stamp set - Stampin Up
Becky Bear Large - Kaszazz
Ink Regal Rose - Stampin Up

Thanks for stopping by


Sunday, March 7, 2010

Designer Handbag Tutorial

.
Hi

I am so excited that I have finally made the tutorial for this handbag. I have had so many requests.

I hope that it is easy for you to follow, any questions just leave me a message and I will respond asap.

Here is a photo of the finished product. (click on the photos to enlarge them)


Here is the recipe for this bag. ( You can substitute the cardstock and papers to ones of your choice)

3 x A4 sheets Riding Hood Red cardstock from Stampin Up (there will be quite a bit left over)
1 x sheet Bella Rose DP from Stampin Up
12 x Gold Brads (sorry, did not include these in the following photo)
4 x oval rings (mine are links cut from a chain)
White Gel Pen
Double sided tape or Snail adhesive
Paper Cutter
Round Tab Punch (Stampin Up)
Small Square Punch (Scissors will do the trick here if you dont have a square punch)

You will need to cut the following:


2 x 18cm x 27cm (7.1" x 10.6") rectangles from Riding Hood Red cardstock
2 x 15cm x 23cm (5.9" x 9.1") rectangles from Bella Rose DP
2 x 29.7cm x 1.2cm (11.7" x .5") strips of Riding Hood Red cardstock
4 x 15cm x 1.2cm (5.9" x .5") strips of Riding Hood Red cardstock
2 x 5cm x 5cm (2" x 2") squares of Riding Hood Red Cardstock (once you have the squares cut these  again on the diagonal so that you end up with 2 triangles from each square)
4 x punched Round Tabs

You will now need to reshape the Round Tabs


TheRound Tabs will be used to attached the handles of the bag.

Fold the Round Tabs in half and use one of the precut strips of cardstock to determine the width of the tab that will remain once the corners have been cut away. Mark the corners of all four Round Tabs with a pencil as shown in the photo. Use a square punch or scissors to cut away teh corners following the pencil lines until you are left with them looking like this.


Using the white gel pen, draw fake stitching around one half of the Round tab as shown. Place double sided tape on the back of the tab but not in the centre. Fold the half of the tab that does not have stitching gently in half trying not to crease it too much but just eough so that you can slip one of the oval rings over it and in to the centre of the tab.

You can now put these aside for the moment as they wont be needed till near the end of the project.

Now you can draw fake stitching on the follow pieces of the project as shown in the photo below


Ignore the two Round Tabs shown in this photo as you have already done those in the previous step.

Now take the two large rectangles of card stock and score them in the following way. Do not use gel pen as I have done in the photo, this was just done so you could clearly see where to score.


Score at 1cm (.4") at one short edge and 3cm (1.2") at the other short edge. Score at 3cm (1.2") at one long edge. You can use scissors to cut away the smale shaded rectangle shown in the above photo.

You should end up with it looking like this


Make a cut on the bottom edge as seen in the photo all the way up to the 3cm score line on both pieces. Click on the photo to enlarge so you can see more clearly what I mean.

Now using double sided tape or SNAIL adhesive stick the DP rectangles to the Cardstock rectangles as shown below


Using double sided tape or Snail adhesive stick the 15cm Strips and triangles to the sides of the handbag as shown in the photo below.


now attach the Round Tabs to the top of the sides of the handbag as shown in the photo below


fold the Round Tab over the top edge of the sides of the handbag with the half of the tab with the stitching on it facing out.

Put some double sided tape on the back of the two remaining long strips of cardstock as shown below These form the straps of the handbag.


Attached the straps to the handbag via the oval rings as shown below.


After attaching both straps then you can joing both sides together with a strip of double sided tape on the the 1cm scored edge and placing a 3cm scored edge on top of it.

Place double sided tape on the other 1cm scored edge and the 3cm scored edge at the bottom as shown in the photo below but do not complete folding the handbag together just yet.


put the gold brads in to place as shown in the photo below.


now you can finish folding the handbag together and you are done!


I do hope that this tutorial has made sense and is easy enough to follow.

Happy crafting!!

Michelle

Saturday, March 6, 2010

New toy to play with with

.
I have been saving up for a while now to get a Zutter Bind It All V2. I have seen them online here in Australia for $109, then a couple of weeks ago I saw them for what I thought was a fantastic price in a shop in town for only $79 but I wasn't in a position to buy one then.

But earlier this week I popped back in to that store to see if they still had some left and I was thrilled to see them reduced even futher to only $63!


So needless to say I grabbed one quick smart!

This evening is the first chance I have had to play with it and I have made a small 13cm x 13cm (5.1" x 5.1") baby's journal.

There are enough pages made from co ordinating cardstock in the journal to have an open two page spread for each month of baby's first year.

Recipe:

2 x chipboard squares
1/2" binding comb
Designer Series Paper from Stampin Up
Pretty in Pink and Regal Rose cardstock from Stampin Up
Stamp - Becky Bear Large from Kaszazz
Lyra Water Colour Crayons

Tuesday, March 2, 2010

More Keepsake/Jewellery Boxes

.
It is turning in to quite a busy week here.

I got an order a few days ago for 10! Keepsake Jewellery Boxes so I have been making a start on those and we have also had a steady stream of people through to view our house (we are up for sale at the moment, Yay! read sarcasm!).

Here are a couple of the boxes I have made so far.


Recipe:

Chocolate Chip & Very Vanilla cardstock - Stampin Up
Candy Lane designer paper - Stampin Up
Very Vanilla 1/4" (6.35cm) Grosgrain Ribbon
Friends 24/7 stamp set - Stampin Up
Sentiment - printed from computer
Image coloured with Chocolate Chip, Creamy Caramel and Old Olive Stampin Up Markers.
Photo Corners punch - Stampin Up


Recipe:

Riding Hood Red & Kiwi Kiss cardstock - Stampin Up
Bella Rose designer paper - Stampin Up
Whisper White 1/4" (6.35cm) Grosgrain Ribbon - Stampin Up
Live Like You Mean It stamp set - Stampin Up
Image coloured with Old Olive and Ruby Red Stampin Up Markers


I have made two of each of these so I still have six more boxes to make to fill the order. I will post other designs as they are completed.

Thanks for stopping by.

Michelle